Installation and Configuration Manual — eCharge Hardy Barth cPH2 2T22
1. Introduction
1.1. Legal provisions
The information contained in these documents is the property of Heckert Solar GmbH. Publication, in whole or in part, requires the written consent of Heckert Solar GmbH.
Subject to changes and printing errors!
1.2. Qualification of the installing electrician
A qualified electrician is a person who has the necessary experience and training:
-
Setting up, switching on, switching off, disconnecting, short-circuiting and repairing circuits and devices
-
Standard maintenance and use of protective devices in accordance with current safety standards
-
First aid/emergency care
-
Current knowledge of local regulations, standards and guidelines
3. Commissioning

|
To install the Hardy-Barth charging station, please follow the instructions in the "cPH2 Charging Station Installation and Operating Instructions." |
|
|
You should also read and familiarize yourself with the "Configuration Manual" for the Salia PCB: |
|
This quick guide refers to the original user manuals. |
Once the charging station has been installed, it must be connected to the customer network via the two network interfaces (LAN) of the two Salia boards (Master, Slave).
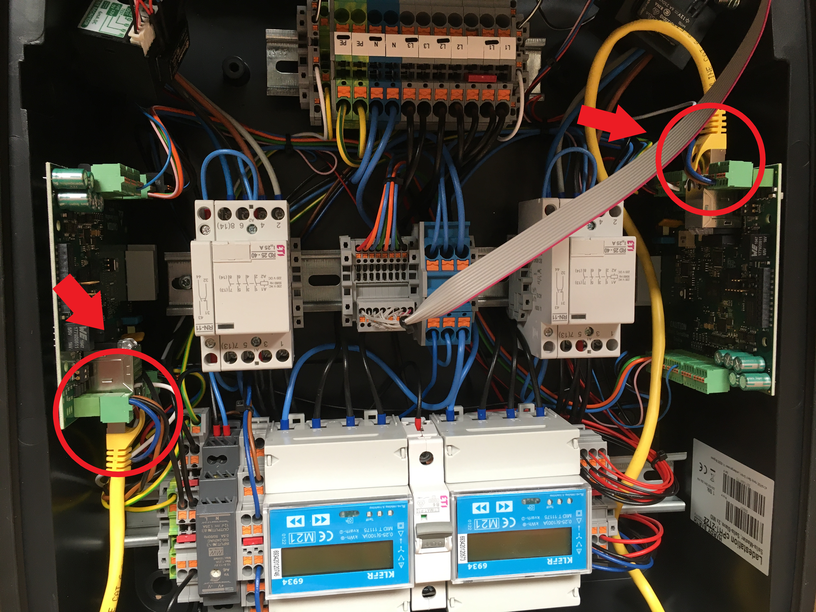
| On delivery, the two network interfaces are connected to each other with a LAN cable. This cable must be disconnected so that each board can be connected separately to the customer network. |
3.1. Connecting the meter
With the cPH2 2T22 model, the two necessary meters are already installed in the charging station. No further work is necessary here.
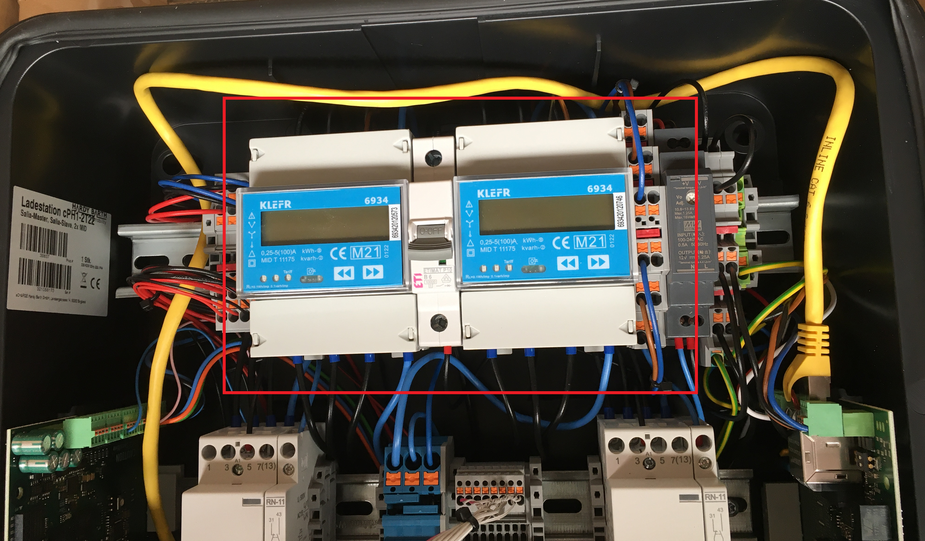
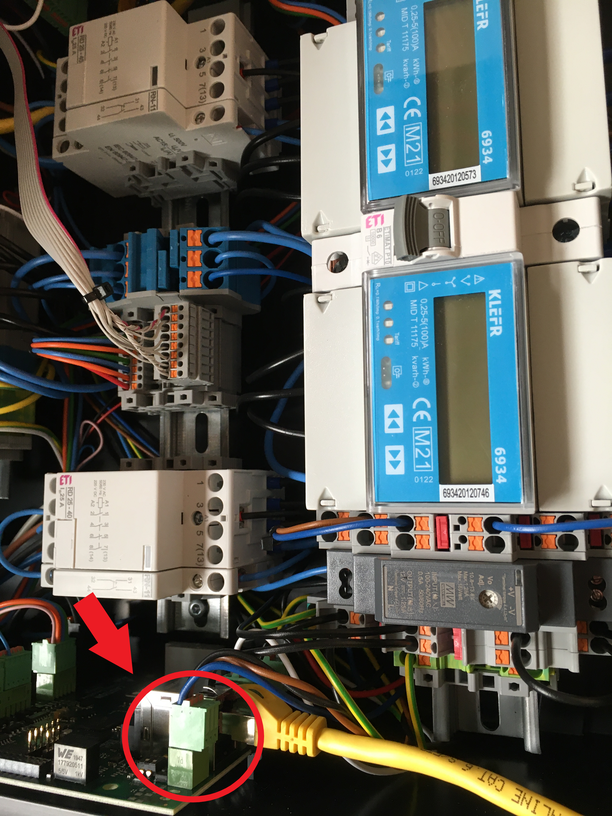
| From our experience, the meter plug connections on the circuit boards are sometimes a little loose. Make sure that both plugs are connected firmly. |
3.2. Configuration
The cPH2 2T22 model is already preconfigured. No further work is required here.
By default, the first charging point of the charging station can be reached at the IP address 192.168.25.30, the second charging point at the IP address 192.168.25.31 and so on.
We recommend that you always use the latest firmware to ensure that all the latest functions of the charging station can be used.
3.3. RFID authorization
We are currently working on compatibility with Hardy Barth RFID authorization.
|
Please note the following software requirements for RFID authorization of your Hardy Barth eCharger cPH2. |
Compatibility with Heckert Solar energy management system |
|
Hardy Barth eCharger |
Requires software version 2.2.0 or newer. |
To enable RFID authorization on a trial basis, please follow the steps below.
-
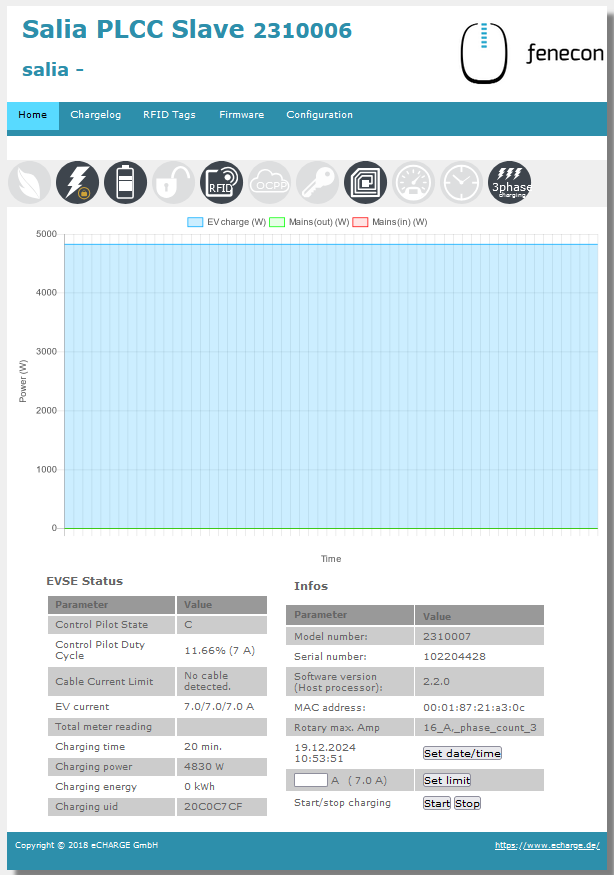
To do this, open the SALIA web interface.
-
Go to the Configuration tab.
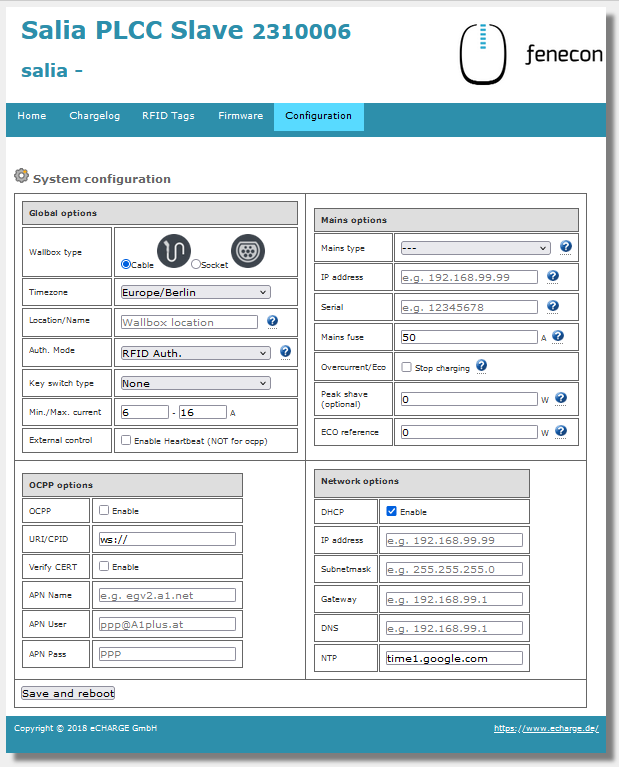
-
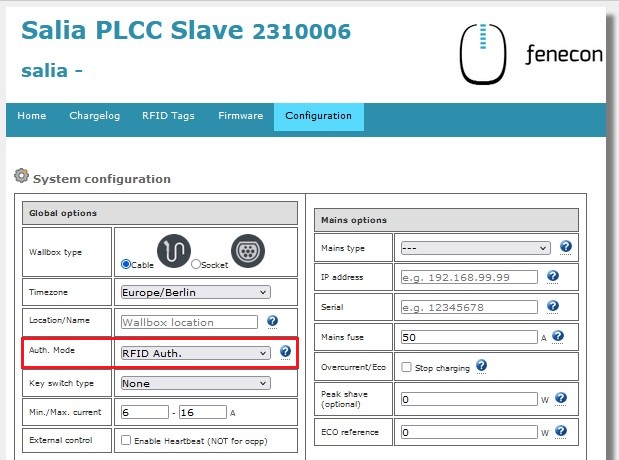
In the Global Options section, set the Authorization Mode from Free Charging to RFID Authorization.
-
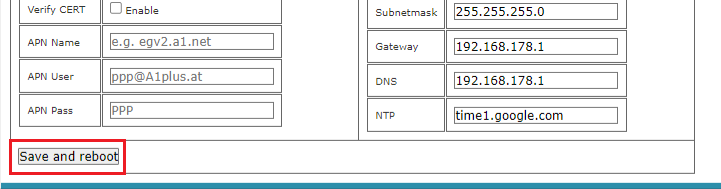
To complete the configuration, please click Save and Reboot.
-
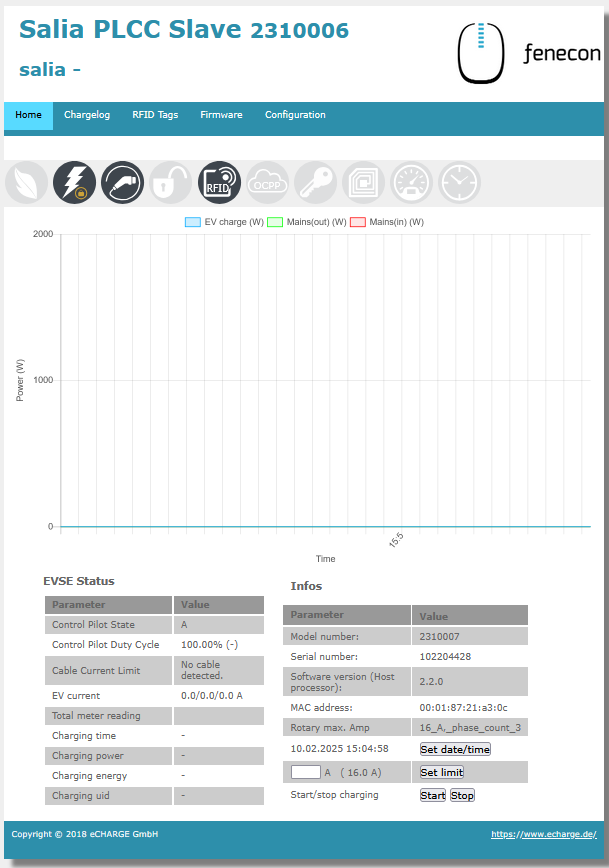
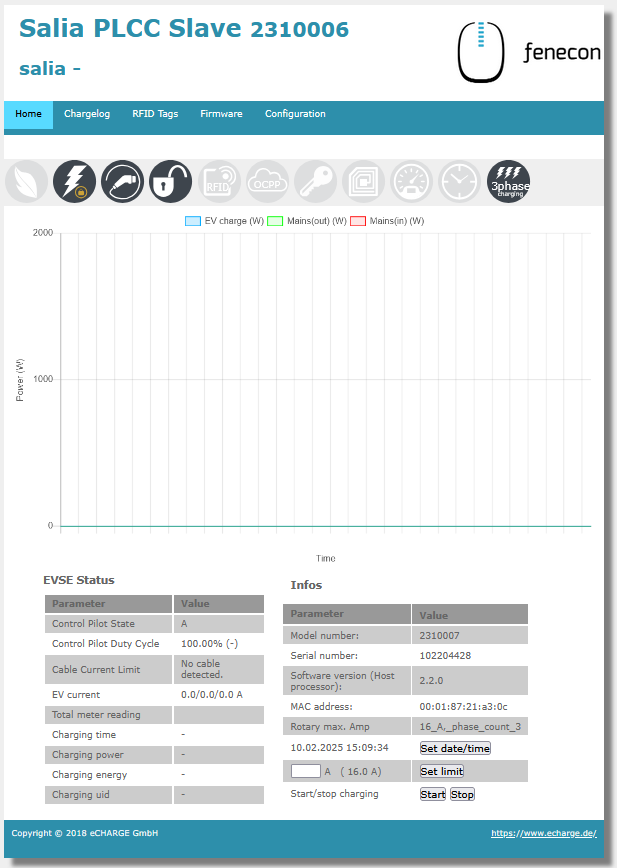
The RFID authorization icon should now appear on the home page of your SALIA web interface.
|
Please note that you can only change the RFID authorization for your Hardy Barth eCharger cPH2 through the SALIA web interface. |
To disable RFID authorization for your Hardy Barth eCharger cPH2, follow steps 1 through 5.
Important: In Step 3, under Global Options, set the Authorization Mode from RFID Authorization to Free Charging.
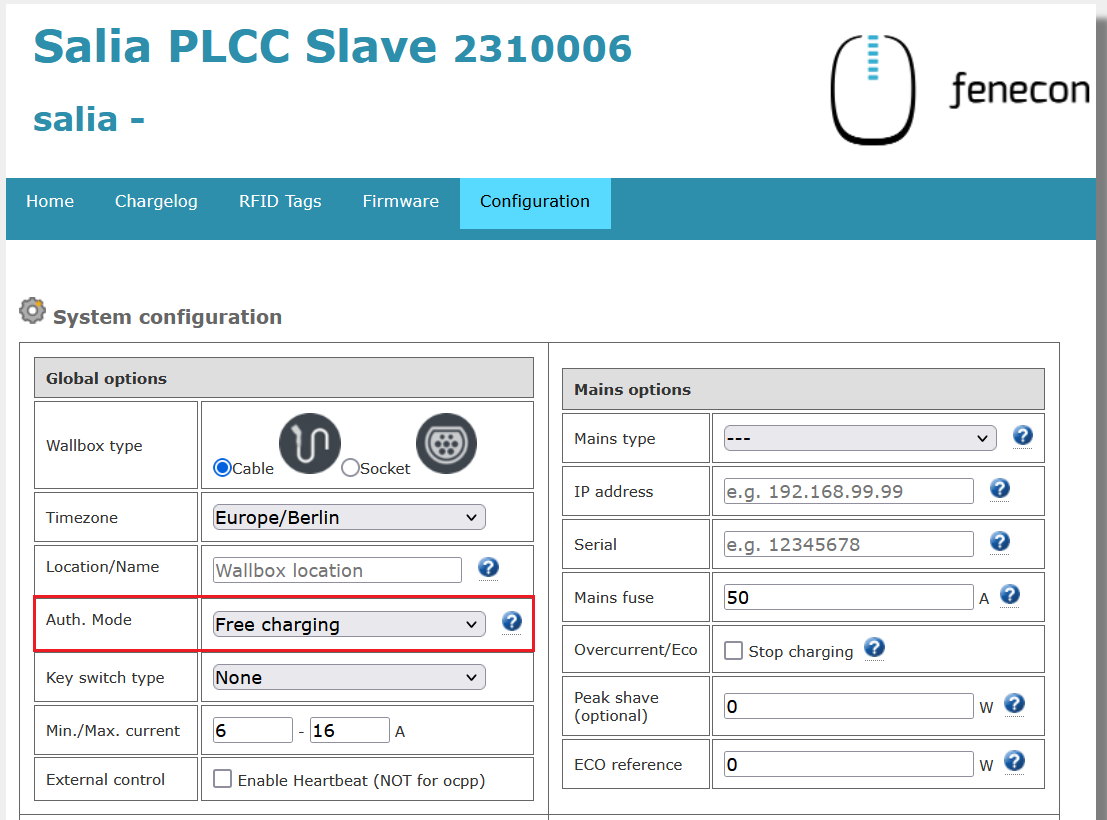
On the home page of your SALIA web interface, the RFID authorization icon should now be grayed out.
|
Please note that no authorization is required in Free Charging mode. Therefore, set your Hardy Barth eCharger cPH2 to OFF via the FEMS AC charging station app when you will be away for an extended period. |
3.4. Updating the charging station firmware
We recommend always using the latest firmware to ensure that all the latest functions of the charging station can be used.
It can be obtained from the eCharge Hardy Barth manufacturer’s website or directly via the link below:
Salia eCharge Firmware
The firmware can then be updated via the web interface of the charging station (see Web interface — Charging station).
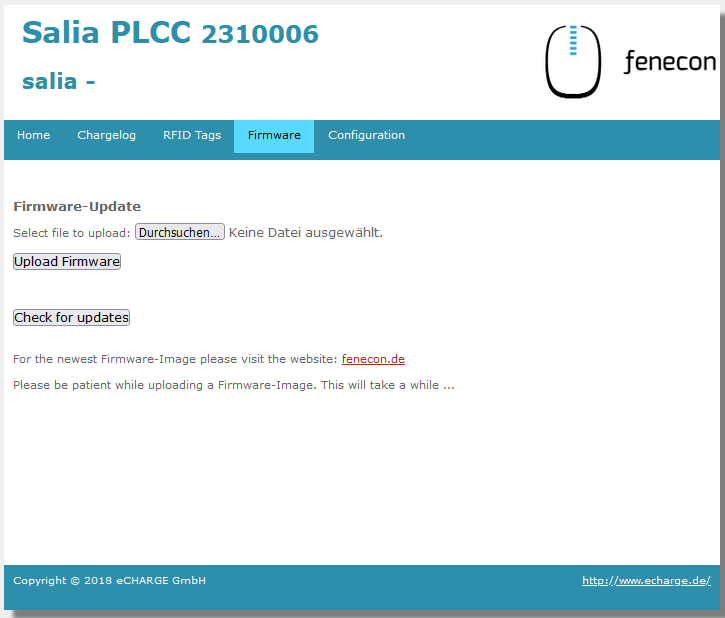
Then proceed as follows:
-
Open the Firmware tab.
-
Select the previously downloaded firmware file with Browse….
-
Click on Upload Firmware.
|
The Check for updates function is only available from version 1.50.0 and up. |
The software update has now been completed.
The configuration is now complete.
4. Install Symphon-E App eCharge Hardy Barth cPH2 2T22 Charging Station
In the Symphon-E App Center you will find all installable Symphon-E Apps — such as the Symphon-E App eCharge Hardy Barth cPH2 2T22 Charging Station.
|
The user manual Symphon-E App Center provides detailed instructions on how to use the Symphon-E App Center. It also explains how to register and redeem a license key. |
Then follow the instructions in the Symphon-E App installation wizard on your Hardy Barth eCharger cPH2.
4.1. Installation wizard
You will then be taken to the installation wizard for Symphon-E App eCharge Hardy Barth cPH2 2T22 Charging Station.
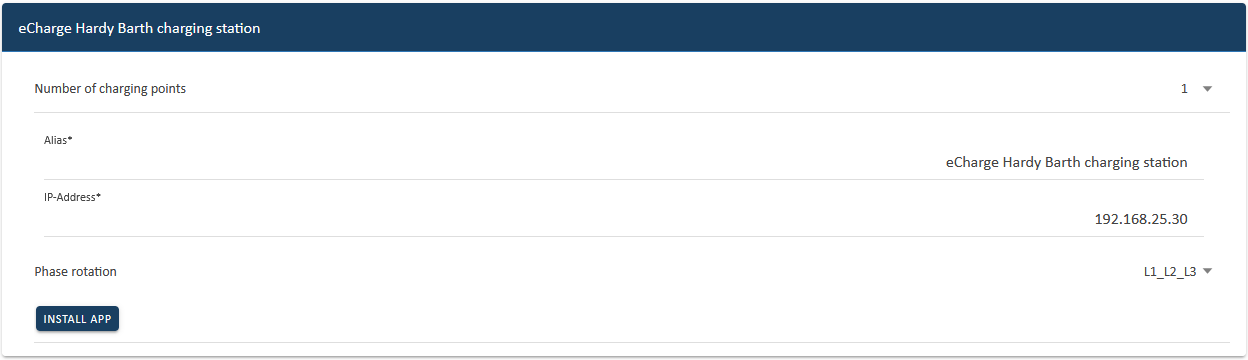
Some of the input fields are pre-filled. Nevertheless, enter your data if it differs from the default values (e. g. IP address). Otherwise, the default values can be retained (e. g. port, Modbus unit ID).
| Mandatory fields are marked with * |
| Check your entries and make sure that they are correct. Otherwise the respective app will not work properly! |
For the Hardy Barth eCharger cPH2 2T22, please select "2" for the number of charging points.
Use the drop-down menu to select the number of charging points.
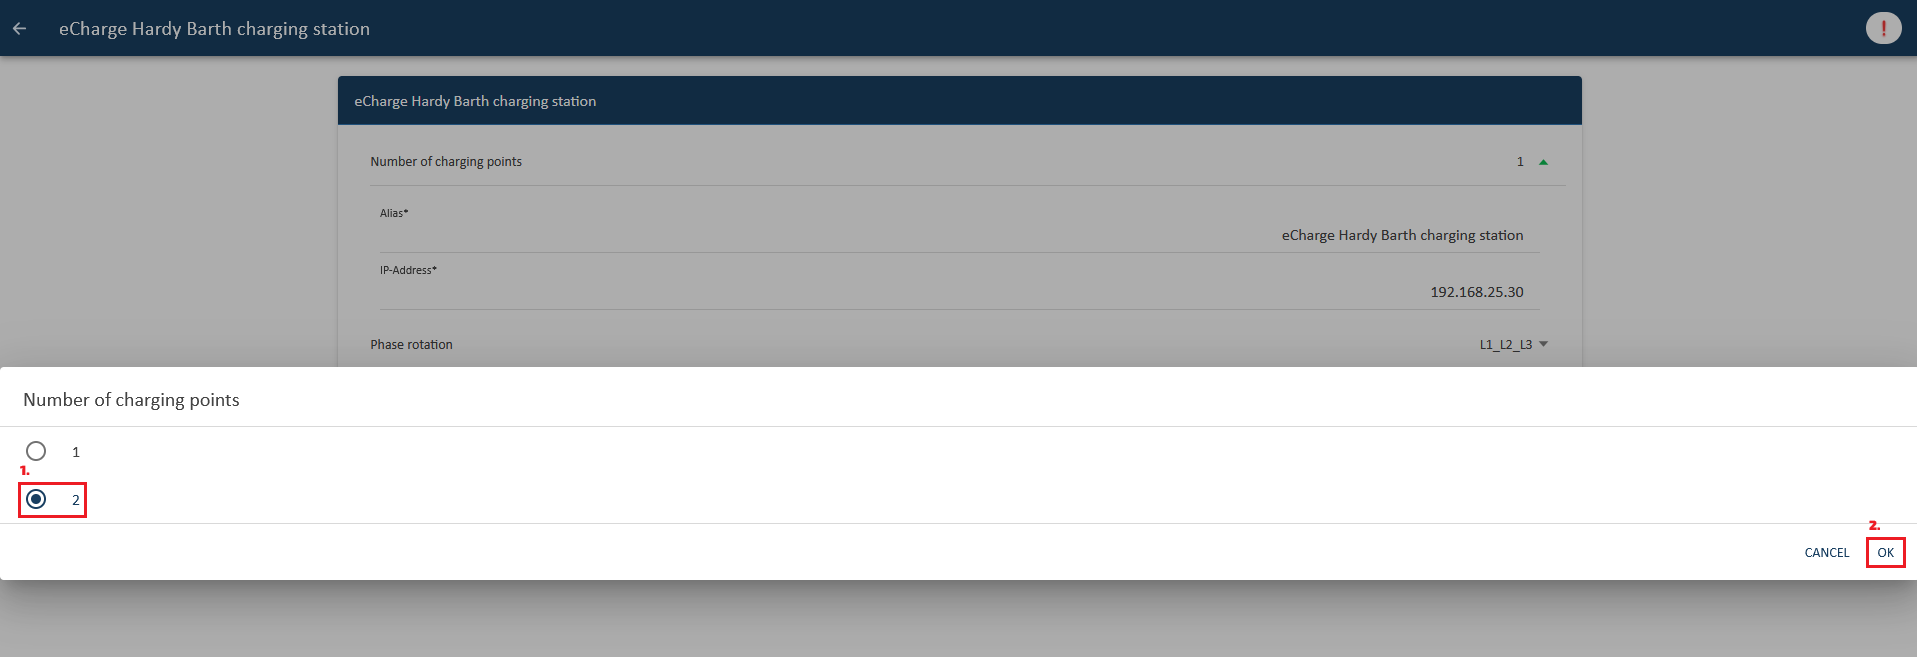
Confirm with "OK".
Please note that the IP addresses for the right and left charging points of the Hardy Barth eCharger must be entered separately.
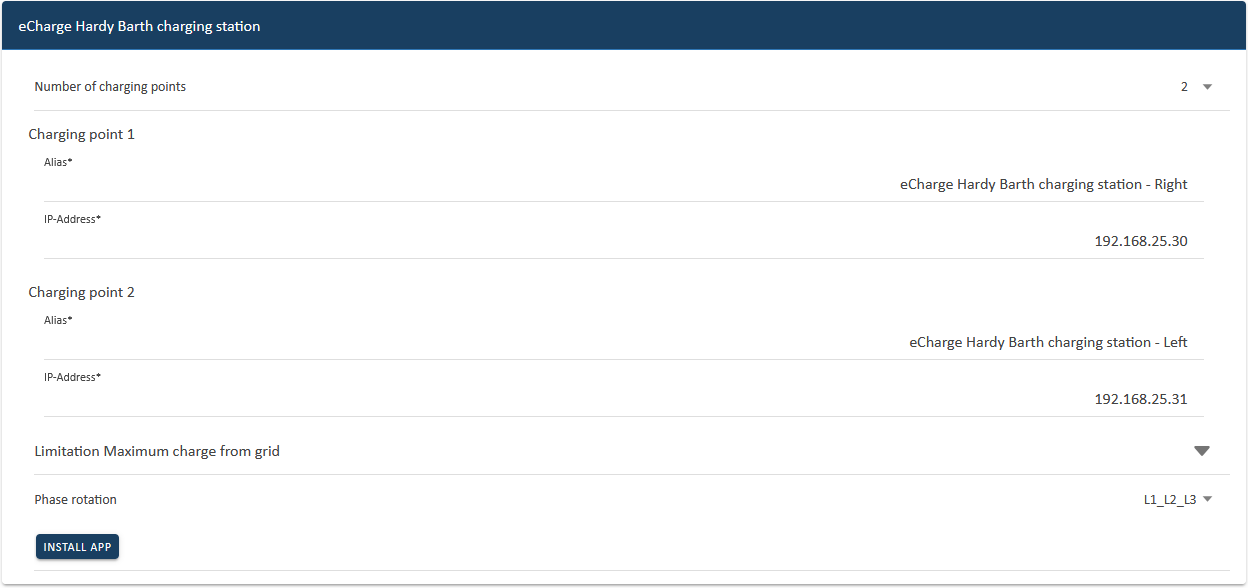
From the second charging point, a limitation of the maximum grid consumption in watts must be set.
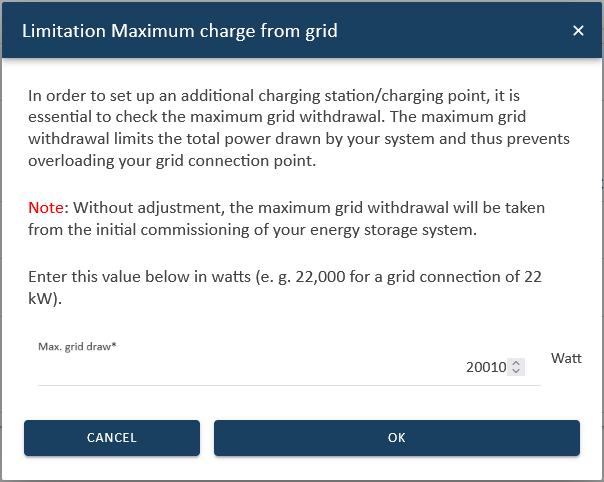
Please confirm that you have read the note and filled in the value correctly.
Confirm with "OK".
In the next step, you can set a phase rotation.
|
Please note that phase rotation is only included from FEMS release 2024.11.2 or later. |
The phase connection L1_L2_L3 is selected as standard.
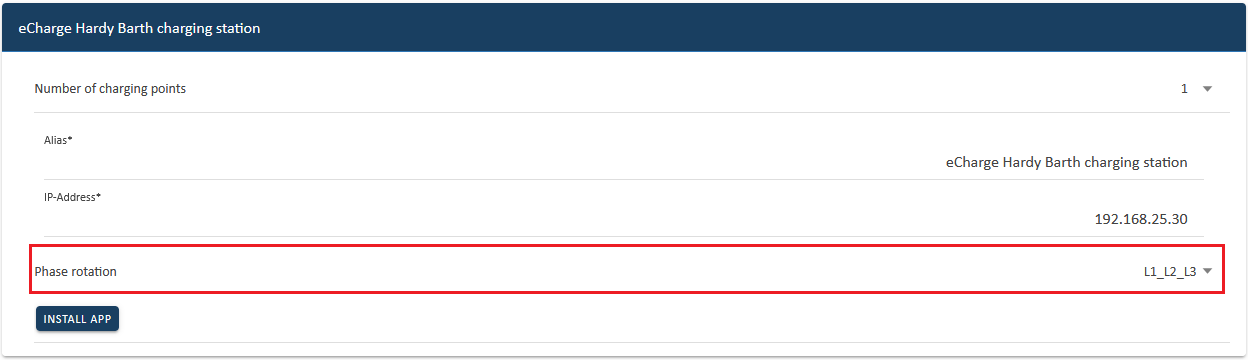
If your phase connection differs from this, you can select a different phase connection using the drop-down button.
|
If you switch from the Write Access app version to the Read Access version, your wallbox requires a restart. |
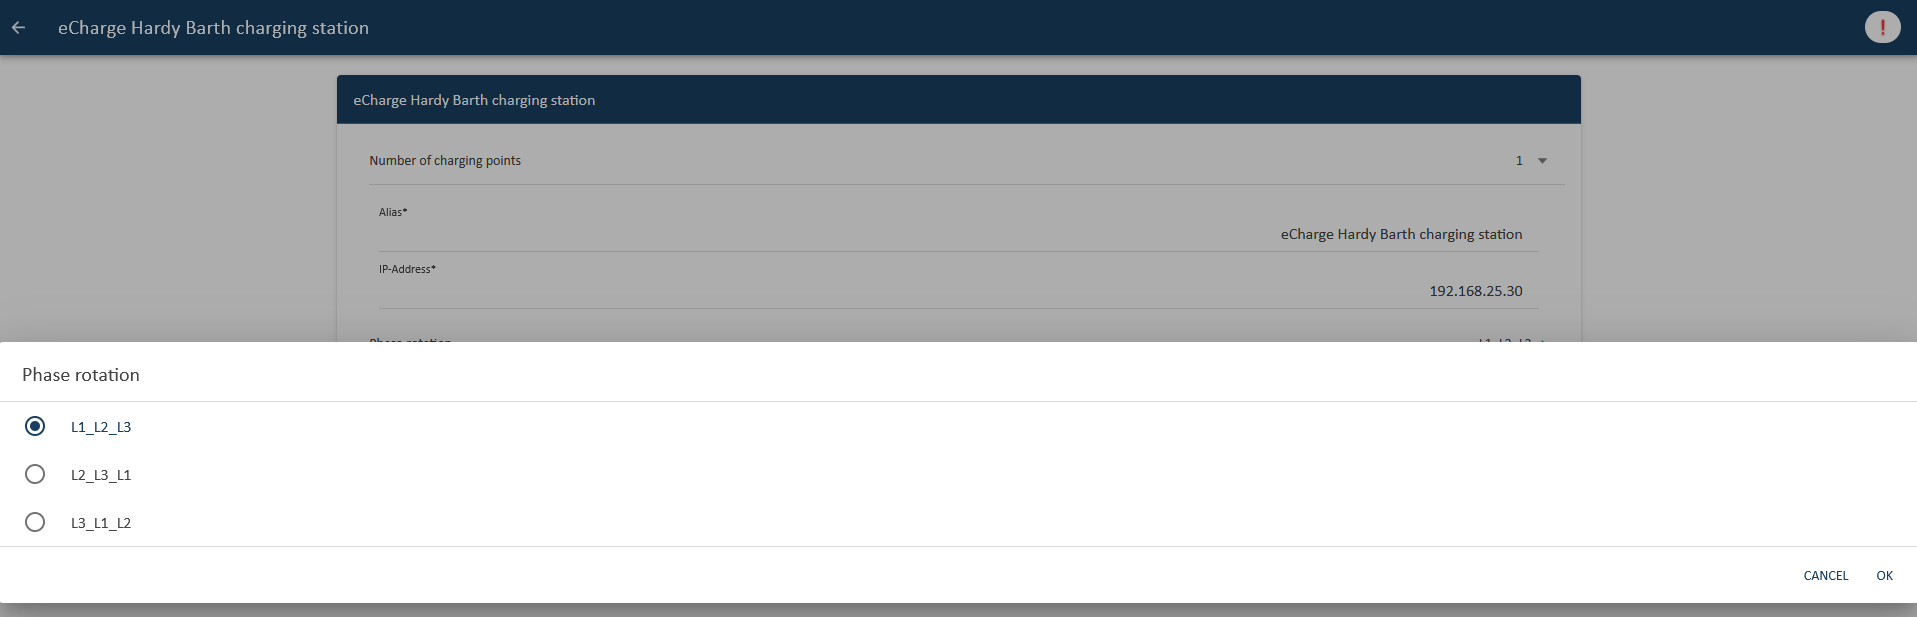
Confirm with "OK".
Then click on "Install app".
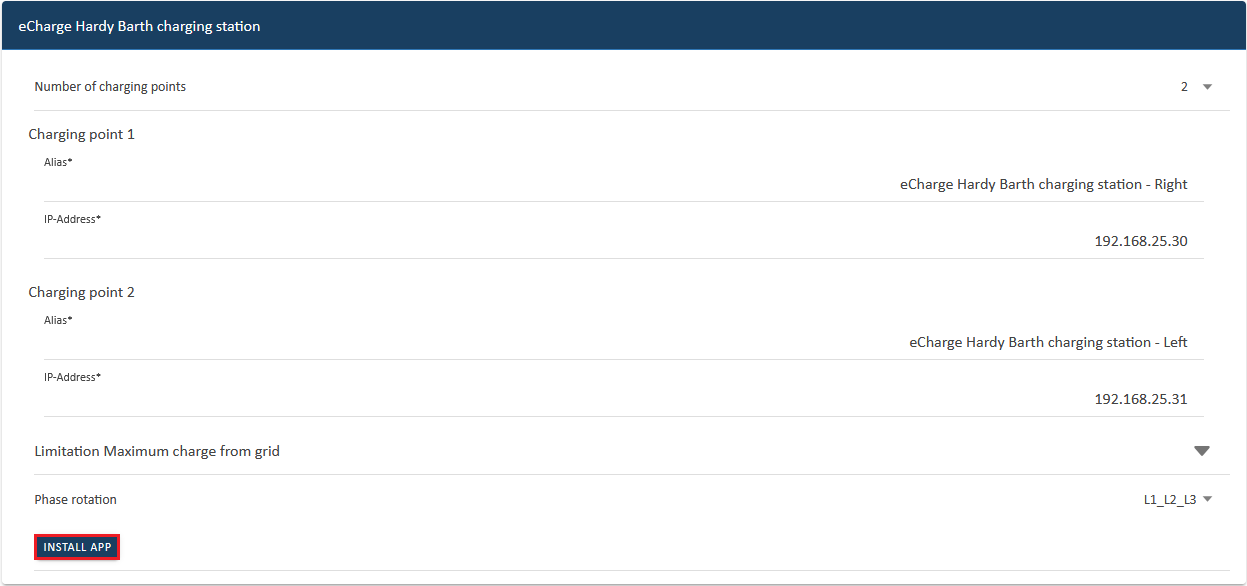
Once the installation process is complete, the new app appears in the overview of the Symphon-E App Center in the "Installed" category.
The Symphon-E App eCharge Hardy Barth cPH2 2T22 Charging Station has been successfully installed.
4.2. Edit EMS app
|
Apps that have already been installed can be edited later to change their configuration settings. To do this, select the app in the Symphon-E App Center overview and click the "Edit App" button. Detailed instructions can be found in the App Center User Manual: https://docs.fenecon.de/en/fems/app_center/App_Center.html#_fems_app_bearbeiten. |